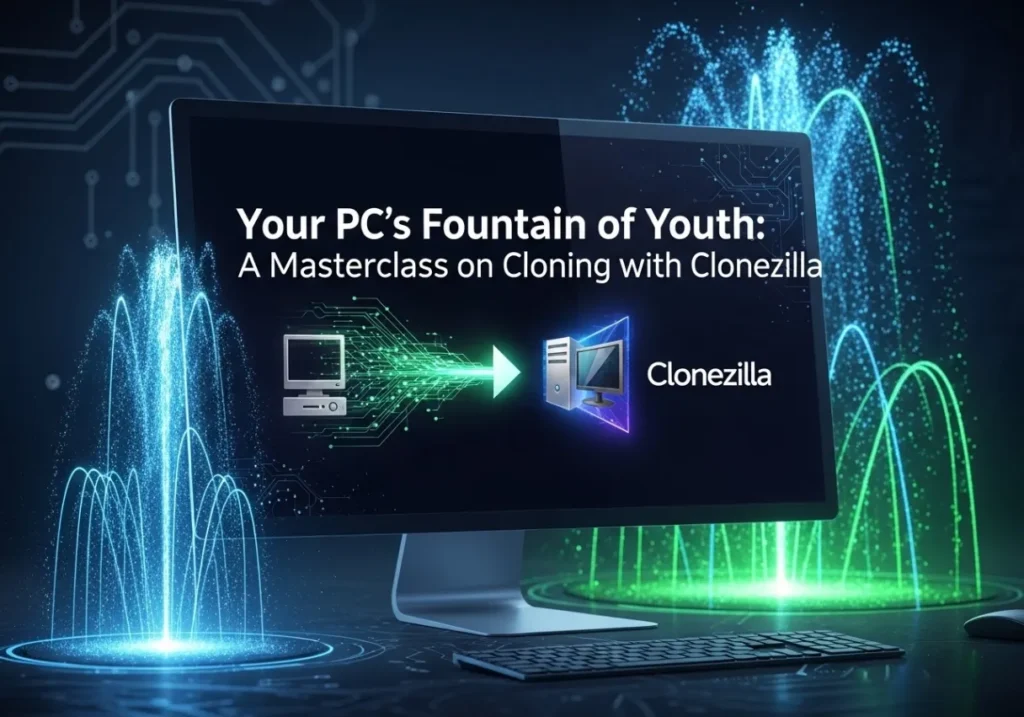
Your PC’s Fountain of Youth: A Masterclass on Cloning with Clonezilla
This is the ultimate, step-by-step visual guide to upgrading your drive without losing a single file. You can do this. Let’s begin.
Does your computer feel like it’s wading through digital molasses? Does it take an eternity to boot up? Is the spinning circle a permanent fixture on your screen?
You probably long for that snappy, “new PC feel.” However, the thought of reinstalling everything is overwhelming. Reinstalling Windows, all your programs, and migrating your files can make you want to give up and suffer in silence.
What if there was a better way? Imagine performing a digital “heart transplant” on your computer. You could move your entire system from your old, slow hard drive to a blazing-fast new Solid State Drive (SSD). This includes every program, every setting, every document, and even your exact desktop layout.
Best of all, you can do this for free. You will use a tool so powerful that professional IT shops rely on it every single day.
Welcome to the world of disk cloning. Welcome to your masterclass on Clonezilla.
Think of your old hard drive as your current, cluttered house. Reinstalling Windows is like throwing everything out and buying all new furniture.
Cloning, on the other hand, is like hiring a team of hyper-efficient professional movers. They pack every single item from every room. They label the boxes and transport them to your new, bigger, better house. Then, they unpack everything exactly where it was before.
When you walk into your new “house,” it’s instantly familiar. However, everything feels faster and more spacious. Clonezilla is that professional moving company for your data.
This guide is designed to be your trusted co-pilot through this entire process. I know Clonezilla’s text-based interface can look scary, like something from a 90s hacker movie. But I promise you, by the end of this, you’ll see it for what it is. It is a precise, powerful, and incredibly reliable tool.
We will go step-by-step. I will explain the ‘why’ behind every click and anticipate every pitfall. In short, we will ensure your upgrade is a resounding success.
Part 1: Mission Briefing – Flawless Preparation is Non-Negotiable
Let me be blunt. Almost every single story of a “cloning disaster” I’ve ever heard was due to a failure in preparation. It was not a failure of the cloning tool itself. Therefore, the ten minutes you spend here will save you hours of potential heartache. Our mantra is: “Measure twice, cut once.” Let’s gather our gear and prepare the patient.
1.1 Your Upgrade Toolkit: The “Go Bag”
First, we need to have all our tools laid out and ready. There’s nothing worse than getting halfway through a process only to realize you’re missing a critical piece.
The New Drive (The Destination)
This will be your new SSD or NVMe drive.
The Old Drive (The Source)
This is the drive currently in your computer that you want to clone.
A Way to Connect Both Drives Simultaneously
This is the most overlooked requirement. Clonezilla needs to see both drives at the same time to perform the copy.
- For Desktop PCs: This is usually easy. You’ll likely have extra SATA data and power cables inside your computer case to temporarily connect the new drive.
- For Laptops: This is where you need a special tool. You will need a USB-to-SATA adapter cable or enclosure. This magical device allows you to plug your new SSD into your laptop’s USB port. It will act just like an external hard drive. They are inexpensive and an essential tool for any tech enthusiast.
A Blank USB Flash Drive
This will become our bootable Clonezilla tool. Anything 4GB or larger will do. Be aware that this process will completely erase the drive.
Access to a Second, Working Computer
You’ll need this just once. You will use it to download Clonezilla and create the bootable USB drive.
1.2 Preparing the Patient: A Health Check for Your Old Drive
We wouldn’t put a sick patient through a major operation. Similarly, we won’t clone a sick drive. We need to ensure the source data is as clean and healthy as possible before we copy it.
Step A: The Ultimate Safety Net – BACKUP YOUR DATA!
I cannot say this loudly enough. Cloning is generally safe. However, you are dealing with a powerful tool that can wipe drives with a single wrong click. Before you do anything else, you must back up your essential files. This includes documents, photos, and project files. You can back them up to an external hard drive, a cloud service like Google Drive, or another computer. This is your parachute. You probably won’t need it, but you’ll be incredibly glad you have it if something goes wrong.
Step B: Clean Up the Clutter
Cloning copies everything, including junk. So, let’s lighten the load first.
- Press the Windows Key and type `Disk Cleanup`.
- Run the tool and let it scan your C: drive.
- Check all the boxes, especially for Temporary files and the Recycle Bin. Then, run the cleanup. This can free up gigabytes of space and will shorten the clone time.
Step C: Check for File System Errors
We need to make sure the “filing cabinet” of your operating system is in perfect order.
- First, press the Windows Key and type `cmd`.
- Next, right-click on “Command Prompt” and select “Run as administrator.”
- In the black window, type the following command and press Enter:
chkdsk C: /f - Windows will tell you it can’t run the check because the drive is in use. It will ask to schedule it on the next restart. Type Y and press Enter.
- Finally, restart your computer. Before Windows loads, you’ll see a screen as it performs the disk check. You must let it finish completely. This ensures we are cloning a healthy, error-free file system.
Part 2: Forging the Magic Wand – Creating Your Bootable Clonezilla USB
Now we will create the tool that will perform the operation. We’re going to put the Clonezilla software onto our USB drive. This allows us to boot the computer directly from it, bypassing Windows entirely.
2.1 Download the Necessary Software
On your second, working computer, download two free pieces of software.
- Clonezilla Live: First, go to the official Clonezilla downloads page. For most modern computers, you’ll want to choose these options:
- CPU architecture: `amd64`
- File type: `iso`
- Then, click Download.
- Rufus: Next, go to the official Rufus website and download the latest version. Rufus is a fantastic utility that makes creating bootable USB drives incredibly simple.
2.2 Creating the Bootable Drive with Rufus
First, plug your blank USB drive into the computer. Then, double-click the Rufus file you downloaded to launch it.
You’ll be presented with a simple window. Here’s how to fill it out:
Device -------> [Your 4GB+ USB Drive]
Boot selection -> [SELECT] <-- Click this
(After clicking, find and choose the clonezilla-live-....iso file)

Partition scheme -> [GPT]
Target system --> [UEFI (non CSM)]
...
[START]
- Device: Rufus should automatically find your USB drive. Make sure it’s the correct one!
- Boot selection: Click the `SELECT` button. Then, find and choose the Clonezilla ISO file you just downloaded.
- Partition scheme: For any computer made in the last ~10 years, `GPT` is the correct choice.
- Finally, click START.
This is your final warning. Rufus will pop up a message, telling you that ALL DATA ON THE USB DRIVE WILL BE DESTROYED. This is your last chance to back up anything from that drive. Click OK to continue.
Rufus will now work its magic. After a few minutes, the progress bar will turn green and say “READY.” Your magic wand is now forged! You can close Rufus and safely eject the USB drive.
Part 3: The Main Event – Performing the Clone
This is it. The moment of truth. Take a deep breath. We are going to go through this screen by screen. Remember, Clonezilla is built for safety. In fact, it will ask you for confirmation multiple times. Read each screen carefully, and you will be fine.
3.1 Connect Your Hardware and Boot from the USB
- First, shut down the computer you want to upgrade.
- Next, connect your new drive. If it’s a desktop, use the internal cables. If it’s a laptop, use your USB-to-SATA adapter.
- Then, plug in your newly created Clonezilla USB drive.
- Turn on the computer and immediately start tapping your computer’s Boot Menu Key. This key is different for every manufacturer. For example, it might be F12 for Dell, F9 for HP, or F8 for ASUS.
- You should see a menu that lets you choose what device to boot from. Use the arrow keys to select your USB drive and press Enter.
3.2 Navigating the Clonezilla Interface (The Step-by-Step Walkthrough)
You will now see a series of text-based screens. Do not be alarmed! It’s simpler than it looks.
You’ll see a blue and gray menu. The first option, “Clonezilla live,” is usually highlighted.
Your Action: Just press Enter.
It will ask you to choose a language. “English” is already selected.
Your Action: Press Enter.
It will ask about your keyboard layout. The easiest option is to leave it as “Don’t touch keymap.”
Your Action: Press Enter.
You have the option to start the program or enter a command line. We want to start the program.
Your Action: Press Enter.
This is an important choice. We are copying directly from one physical drive to another.
Your Action: Select `device-device` and press Enter.
It asks if you’re a beginner or an expert. Let’s be humble. Beginner mode makes all the safe, smart choices for us.
Your Action: Select `Beginner` and press Enter.
It asks what kind of copy you want to perform. We are cloning an entire disk to another local disk.
Your Action: Select `disk_to_local_disk` and press Enter.
THE MOST IMPORTANT STEP: Choosing Your SOURCE Drive
Stop. Read this three times. The next screen will ask you to choose the SOURCE drive. This is your OLD DRIVE, the one that contains all your data. If you choose the wrong drive here, you will wipe all of your data. Clonezilla identifies drives by model name, size, and a system name like `sda`.
You will see a list of all drives connected to your computer. You MUST correctly identify your old drive. Look at the size and model name to be 100% certain.
Your Action: Use the arrow keys to highlight your OLD DRIVE. Press Enter.
THE SECOND MOST IMPORTANT STEP: Choosing Your DESTINATION Drive
Stop again. Read this three times. Now, Clonezilla will ask for the DESTINATION drive. This is your NEW, EMPTY DRIVE. Everything on the drive you select here will be PERMANENTLY ERASED. There is no undo.
You will see a list of the remaining drives.
Your Action: Use the arrow keys to highlight your NEW DRIVE. Double, triple check it. Then, press Enter.
Because we chose Beginner mode, it asks if we want to check the source file system. We already ran `chkdsk` in our preparation phase, so our file system is healthy.
Your Action: We can safely press Enter to accept the default and skip this check.
Clonezilla is a careful program. As a result, it will now ask you for confirmation several times. It will show you the command it’s about to run.
Your Action: Read the command to ensure the source and destination are correct. Type y and press Enter. It will warn you one more time. Type y and press Enter again.
The cloning process will now begin! You will see a progress bar and a lot of text scrolling on the screen. This is the part where you can relax. Depending on the size of your drive, this can take a while. Go make a cup of coffee. You’ve earned it.
When it’s finished, you’ll see a message that it’s complete. You will then be presented with a menu to “poweroff” or “reboot.”
Your Action: Choose poweroff.
Part 4: The Aftermath – Post-Clone Operations
The operation was a success. However, the patient isn’t off the table just yet. We need to perform the physical swap and a few final checks in Windows.
4.1 The Great Swap
- First, with the computer powered off, unplug the Clonezilla USB drive.
- Next, you must disconnect your old source drive. This is critical to avoid confusion for Windows on the first boot.
- Finally, install the new, cloned drive in the primary drive bay. For a desktop, this means moving the main SATA cable. For a laptop, it means physically unscrewing the old drive and putting the new one in its place.
4.2 The First Boot and Verification
Close up your computer, plug everything in, and press the power button. The first boot on the new drive might take a little longer than usual. This is completely normal because Windows is adjusting to the new hardware.
When it boots to your desktop, it should look exactly as it did before. This is the magic of a perfect clone. Open a few programs and browse your files to confirm everything is working.
4.3 Expanding the Partition (The Best Part!)
If you cloned to a larger drive (for example, from a 500GB HDD to a 1TB SSD), your computer will still think it only has 500GB of space. We need to tell Windows it can use the new, empty space.
- Right-click on the Start Menu and select Disk Management.
- You will see a graphical map of your drives. On your new drive, you will see your C: partition, followed by a black bar labeled “Unallocated space.”
- Right-click on your C: partition (the blue bar) and select “Extend Volume…”
- A simple wizard will pop up. Just click “Next” through all the prompts, accepting the defaults. It will automatically claim all the unallocated space.
- Voila! Your C: drive now shows its full, glorious new capacity.
4.4 What to Do with the Old Drive?
Here is my advice: do not wipe your old drive immediately. Instead, keep it safely stored somewhere for at least a week. This is your perfect, bootable backup in case anything unexpected happens. Once you are 100% confident your new system is stable, you can plug the old drive back in as a secondary drive. Then, you can use Disk Management to format it as a new, empty drive for backups.
Welcome to the World of Speed!
You did it. You navigated a professional-grade tool and performed a delicate digital operation. You successfully upgraded your computer’s core component. In addition, you didn’t just make your computer faster; you gained a powerful new skill. You also have a deeper understanding of how your machine works.
Enjoy the silence of no spinning platters. Enjoy the snap of applications opening instantly. Enjoy that “new PC feel,” earned with your own two hands.
Did you find this guide helpful? Did you run into any issues? Share your cloning success stories and questions in the comments below!

I¦ve been exploring for a little for any high quality articles or blog posts on this kind of house . Exploring in Yahoo I finally stumbled upon this site. Reading this information So i am satisfied to express that I have a very just right uncanny feeling I discovered just what I needed. I so much no doubt will make certain to don¦t fail to remember this site and give it a look on a continuing basis.
wonderful points altogether, you simply gained a new reader. What would you recommend in regards to your post that you made some days ago? Any positive?
Thanks.
You are a very capable individual!
Thank you for your appreciation. can you share your interests too?
Some genuinely nice and utilitarian information on this site, also I conceive the design has got good features.
As a Newbie, I am continuously browsing online for articles that can aid me. Thank you
It?¦s really a nice and helpful piece of information. I?¦m happy that you just shared this useful info with us. Please stay us informed like this. Thanks for sharing.
I know this if off topic but I’m looking into starting my own blog and was curious what all is required to get setup? I’m assuming having a blog like yours would cost a pretty penny? I’m not very web savvy so I’m not 100 positive. Any suggestions or advice would be greatly appreciated. Many thanks
I have been surfing online more than 3 hours today, yet I
never found any interesting article like yours. It is pretty worth
enough for me. In my opinion, if all site owners and bloggers made
good content as you did, the net will be a lot more useful than ever before.
Awsome site! I am loving it!! Will be back later to read some more. I am bookmarking your feeds also.