A Beginner’s Guide to Subnetting: Step-by-Step with Easy Examples
Conquer one of networking’s most feared topics with a simple method you can use anywhere.
Introduction: Why Subnetting Isn’t Scary (And Why You Need It)
Let’s talk about a topic that often makes new network engineers nervous: subnetting. It can look like a wall of confusing math and binary numbers. However, I promise that it’s much simpler than it appears.
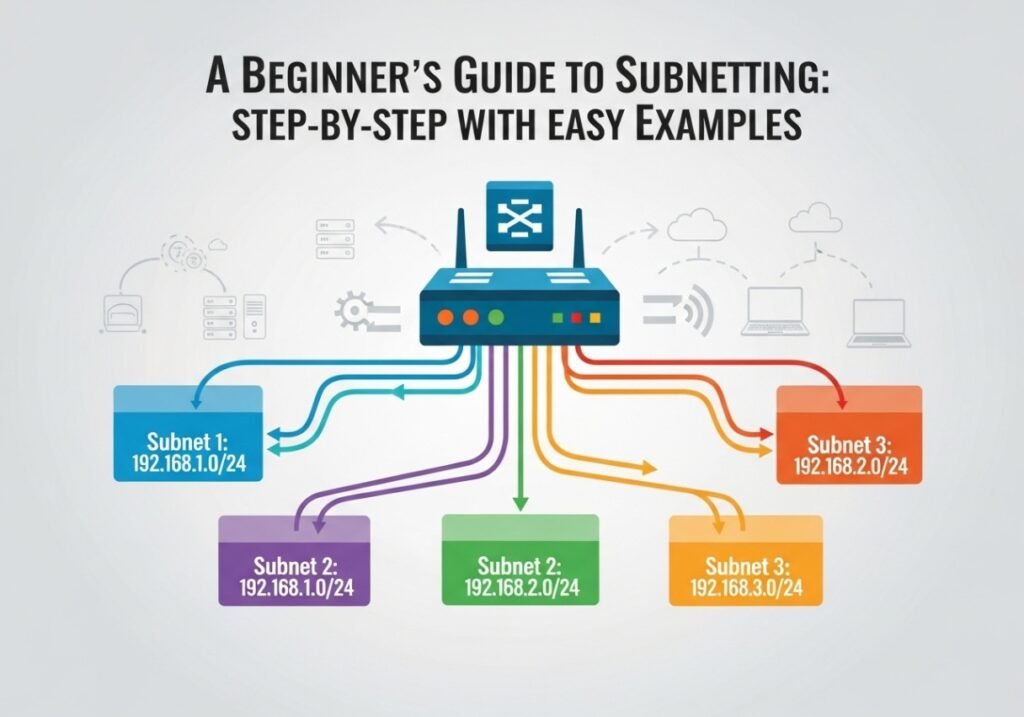
At its core, subnetting is just a process. You take one large network and divide it into several smaller, more manageable networks. We call these smaller networks “subnets.”
So, why do we bother with this?
Imagine a company with 100 employees. They all work in one massive, open-plan office. The salespeople can hear the engineers’ technical debates. The marketing team is distracted by support calls. This setup is chaotic, inefficient, and insecure.
Now, imagine that same office with walls creating separate departments for Sales, Engineering, and Marketing. This is exactly what subnetting does for a computer network. In short, it provides major benefits.
Key Benefits of Subnetting
- Improved Security: Subnetting creates “digital fences.” For example, you can create a rule on your router that blocks the “Guest Wi-Fi” subnet from accessing the “Internal Servers” subnet. This kind of segmentation is essential for modern network security.
- Better Performance: Some network traffic, called broadcasts, is sent to every device. Subnetting contains this traffic within each smaller subnet. As a result, you reduce network congestion and make everything faster.
- Great Organization: You can assign specific subnets to specific functions. For instance, you can have a subnet for servers, another for workstations, and a third for VoIP phones. This makes the network far easier to manage and troubleshoot.
This guide will give you a simple, repeatable 6-step method. You can use it to solve any basic subnetting problem. Let’s get started.
The Prerequisite Knowledge
Before we start dividing networks, let’s review the building blocks.
What is an IP Address?
An IPv4 address (like 192.168.1.101) is a unique logical address for a device. It’s made of four numbers called octets, separated by dots. Each octet can be any number from 0 to 255.
Understanding Subnet Masks
A Subnet Mask (like 255.255.255.0) works with an IP address. Its job is to separate the IP address into two distinct parts:
- The Network Portion: This part identifies the network itself. All devices on the same subnet will share the same network portion.
- The Host Portion: This part uniquely identifies a specific device on that network.
For example, with the IP 192.168.1.101 and the mask 255.255.255.0, the 192.168.1 is the network portion. The final .101 is the host portion.
What is CIDR Notation?
Typing out 255.255.255.0 is slow. Because of this, modern networking uses CIDR (Classless Inter-Domain Routing) notation. It’s just a slash with a number, like /24.
This number simply represents how many bits are in the network portion of the address. So, 255.255.255.0 is the same as /24. You will almost always see it written as 192.168.1.101/24.
The Key to Everything: Simple Binary Math
This is the part that usually worries people, but it’s just simple counting. You do not need to be a math genius. To understand subnetting, you only need to know the place values of the 8 bits in an octet.
Here is the only chart you need to memorize. It is the key to all subnetting.
| Powers-of-2 Chart (The 8 Bits of an Octet) | ||||||||
|---|---|---|---|---|---|---|---|---|
| Place Value | 128 | 64 | 32 | 16 | 8 | 4 | 2 | 1 |
| Power of 2 | 27 | 26 | 25 | 24 | 23 | 22 | 21 | 20 |
How to Convert Binary to Decimal
To find the decimal value, just add up the place values for every bit that is a ‘1’. It’s that simple.
- Binary
11000000is 128 + 64 = 192. - Binary
11110000is 128 + 64 + 32 + 16 = 240.
That’s all the binary math you need for today.
Example 1: Subnetting for a Number of Networks
This is a very common scenario. You will be given a network and asked to create a certain number of subnets from it.
The Scenario: Your company uses the network address 200.50.10.0/24. You need to create at least 5 separate subnets for different departments.
Step 1: Define Your Goal
First, identify your main requirement. In this case, our goal is to create 5 subnets.
Step 2: Find the “Bits to Borrow”
To create subnets, we must “borrow” bits from the host portion of the address. How many do we need? We use this simple formula:
2n ≥ Number of Subnets Needed (where ‘n’ is the number of bits to borrow).
- If we borrow 1 bit (n=1): 21 = 2 subnets. This is not enough.
- If we borrow 2 bits (n=2): 22 = 4 subnets. This is still not enough.
- If we borrow 3 bits (n=3): 23 = 8 subnets. This meets our requirement of at least 5.
Therefore, we must borrow 3 bits from the host portion.
Step 3: Calculate the New Subnet Mask
Our original mask was /24. We are borrowing 3 bits. This means our new subnet mask is simply:
24 (original) + 3 (borrowed) = 27. Our new mask is /27.
Next, we find the decimal value. A /27 mask means the first 3 bits of the last octet are turned on: 11100000. Using our binary chart, this is 128 + 64 + 32 = 224. So, the full subnet mask is 255.255.255.224.
Step 4: Determine the Block Size
The block size (or “magic number”) tells you where each new subnet starts. To find it, look at the place value of the last borrowed bit. In our new mask (11100000), the last ‘1’ is in the 32’s place.
This means our block size is 32. Our subnets will go up in increments of 32.
Step 5: List the Subnet IDs
Now, we just start with our original network (200.50.10.0) and add the block size (32) to the fourth octet.
- Subnet 1:
200.50.10.0 - Subnet 2:
200.50.10.32 - Subnet 3:
200.50.10.64 - Subnet 4:
200.50.10.96 - Subnet 5:
200.50.10.128
These are the **Network IDs** for each of our new subnets. You cannot assign these addresses to a device.
Step 6: Flesh out the Details
Every subnet has two reserved addresses: the first address (Network ID) and the last address (Broadcast Address). The usable host IPs are everything in between.
Let’s detail the first three subnets:
| Subnet | Network ID | First Usable Host | Last Usable Host | Broadcast Address |
|---|---|---|---|---|
| 1 | 200.50.10.0 |
200.50.10.1 | 200.50.10.30 | 200.50.10.31 |
| 2 | 200.50.10.32 |
200.50.10.33 | 200.50.10.62 | 200.50.10.63 |
| 3 | 200.50.10.64 |
200.50.10.65 | 200.50.10.94 | 200.50.10.95 |
Example 2: Subnetting for a Number of Hosts
Let’s try the other common scenario. This time, you know how many devices you need on each network.
The Scenario: You are setting up a network for a new office using the address range 172.16.0.0/16. You need to create several subnets, and each subnet must support at least 500 devices.
Step 1: Define Your Goal
Our main requirement is 500 hosts per subnet.
Step 2: Find the “Bits to Keep” for Hosts
Here, we work backward. We need to find how many bits to *leave* in the host portion. The formula is:
(2h) – 2 ≥ Number of Hosts Needed (where ‘h’ is the number of host bits. We subtract 2 for the Network and Broadcast addresses).
- If h=8: (28)-2 = 254 hosts. (Not enough)
- If h=9: (29)-2 = 510 hosts. (This meets our requirement of at least 500)
We must keep 9 bits in the host portion.
Step 3: Calculate the New Subnet Mask
An IPv4 address has 32 total bits. If we must reserve 9 bits for hosts, the rest must be for the network part.
32 (total) – 9 (host bits) = 23. Our new subnet mask is /23.
Step 4: Determine the Block Size
Our new mask is /23. This means the block size is in the *third* octet. The last network bit is the 2’s place in that octet. So, our block size is 2 in the third octet.
Step 5: List the Subnet IDs
Starting at 172.16.0.0, we add our block size of 2 to the third octet.
- Subnet 1:
172.16.0.0 - Subnet 2:
172.16.2.0 - Subnet 3:
172.16.4.0
Step 6: Flesh out a Subnet
Let’s detail the second subnet, 172.16.2.0/23. The next subnet starts at 172.16.4.0, so our broadcast address will be 172.16.3.255.
- Network ID:
172.16.2.0 - First Usable Host:
172.16.2.1 - Last Usable Host:
172.16.3.254 - Broadcast Address:
172.16.3.255
You have successfully created a subnet that can support 510 hosts, which meets the design requirement.
Next Level: What is VLSM?
VLSM stands for **Variable Length Subnet Masking**. This is a more advanced technique, but it’s easy to understand once you master the basics. VLSM simply means you **subnet a subnet**.
This process allows you to use different subnet masks for different subnets, which is incredibly efficient. For example, you can create a large /26 subnet for your 60 user devices, and then take another small /26 block and subnet it *again* with a /30 mask. This creates many tiny networks that are perfect for the links between your routers, which only ever need two IP addresses. This avoids wasting addresses and is a key skill for professional network design.
The Ultimate Subnetting Cheat Sheet (Class C)
This table is an invaluable reference for quickly seeing the relationship between CIDR masks, subnets, and hosts when starting from a /24 network.
| CIDR | Subnet Mask | # of Subnets | Hosts per Subnet |
|---|---|---|---|
/24 | 255.255.255.0 | 1 | 254 |
/25 | 255.255.255.128 | 2 | 126 |
/26 | 255.255.255.192 | 4 | 62 |
/27 | 255.255.255.224 | 8 | 30 |
/28 | 255.255.255.240 | 16 | 14 |
/29 | 255.255.255.248 | 32 | 6 |
/30 | 255.255.255.252 | 64 | 2 |
Conclusion: Practice is Everything
You have now learned a structured, repeatable method for solving subnetting problems. The fear of subnetting comes from trying to memorize everything. However, the mastery comes from understanding the *process*.
The best way to get comfortable is to practice. Grab a pen and paper. Invent a scenario and work through the 6 steps. After a few practice runs, this entire process will become second nature. As a result, you will have mastered one of networking’s most essential skills.


Great article and right to the point. I don’t know if this is actually the best place to ask but do you folks have any thoughts on where to employ some professional writers? Thanks 🙂
Hey, you used to write wonderful, but the last few posts have been kinda boringK I miss your tremendous writings. Past few posts are just a little bit out of track! come on!
Excellent post. I was checking constantly this blog and I am impressed! Very useful information specifically the last part 🙂 I care for such info much. I was seeking this certain information for a long time. Thank you and best of luck.
Great write-up, I am normal visitor of one¦s site, maintain up the excellent operate, and It’s going to be a regular visitor for a long time.
Thanks.
It’s a pity you don’t have a donate button! I’d most certainly donate to this outstanding blog! I guess for now i’ll settle for bookmarking and adding your RSS feed to my Google account. I look forward to new updates and will talk about this blog with my Facebook group. Talk soon!
Thank you for the appreciation; it is incredibly helpful as I continue learning how to improve every aspect of this site.
But a smiling visitant here to share the love (:, btw outstanding pattern.
thanks for your appreciation.
Hi, just required you to know I he added your site to my Google bookmarks due to your layout. But seriously, I believe your internet site has 1 in the freshest theme I??ve came across. It extremely helps make reading your blog significantly easier.
The other day, while I was at work, my cousin stole my iPad and tested to see if it can survive a forty foot drop, just so she can be a youtube sensation. My apple ipad is now broken and she has 83 views. I know this is completely off topic but I had to share it with someone!
Hello my family member! I want to say that this post is awesome, nice written and come with approximately all vital infos. I would like to see more posts like this .
Hey there, You’ve done an excellent job. I’ll certainly digg it and personally recommend to my friends. I’m confident they will be benefited from this web site.